
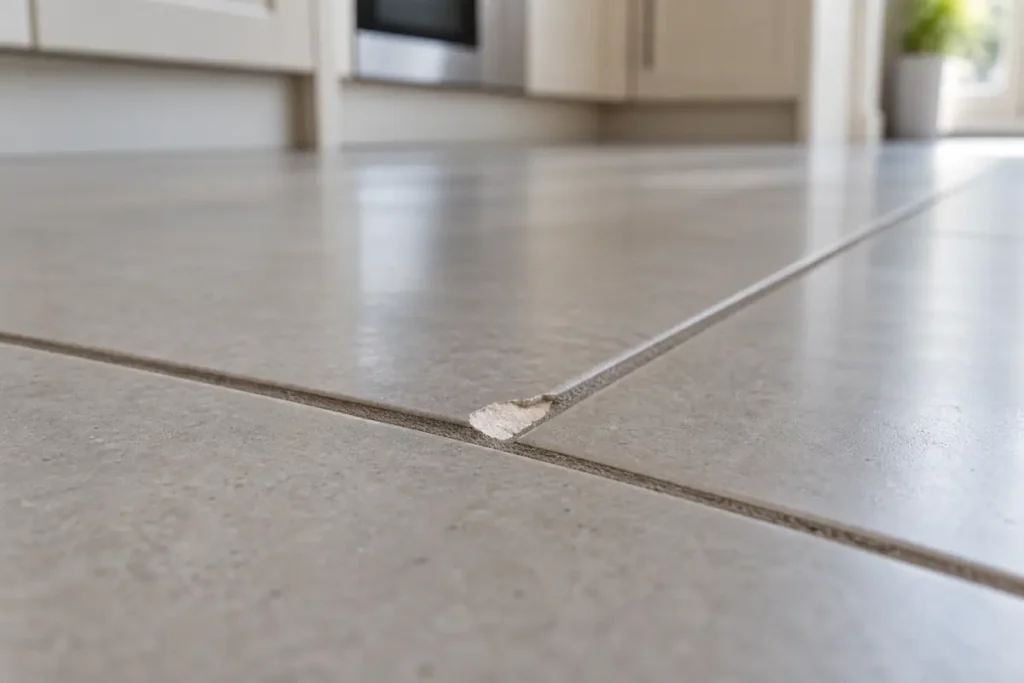
A small chip in an otherwise sound ceramic or porcelain tile can often be repaired with a purpose-made, colour-matched tile repair compound. The basic process is to clean and dry the damaged area, protect the surrounding glaze, mix the product exactly as instructed, press a small amount into the chip, level it and leave it to cure fully.
That is a cosmetic repair, not a cure for movement, failed adhesive or damaged waterproofing. Replace the tile, or arrange an assessment, if it is cracked through, loose, hollow-sounding, badly broken, repeatedly damaged or in a shower or wet area where water may pass behind the finish. Manufacturer instructions for the tile and repair product always take priority.
Table of Contents
Can a chipped tile be repaired?
Repair is usually reasonable when the chip is small, shallow and stable, the tile remains firmly bonded, and the damage has not crossed a movement joint or exposed a waterproof layer. Filling the recess can remove a sharp edge and make the mark less noticeable, but no DIY method can guarantee an invisible result.
Replacement is usually the better option when:
- a crack runs across the tile or into neighbouring tiles
- tapping produces a hollow sound over a substantial area
- the tile rocks, flexes or has lifted edges
- the chip is deep, spreading or in a load-bearing edge on a busy floor
- moisture, staining or softness suggests water has reached the background
- damage keeps returning after repair
- a matching spare tile is available and replacement can be completed safely
Sharp exposed edges should be isolated from bare feet and dealt with promptly. Do not investigate beneath a tile where hidden underfloor heating, pipes, cables or waterproofing may be present unless you know the construction and are competent to work on it.
How to identify the tile material
Look at a spare tile, packaging or invoice first. If none is available, the exposed body in the chip may offer a clue, but appearance alone is not conclusive.
Ceramic tile
Glazed ceramic often has a coloured surface over a lighter clay body. It is comparatively easy to shape and colour-match, although the glaze’s sheen may be difficult to reproduce.
Porcelain tile
Porcelain is denser and may be through-coloured or glazed. Its hard surface can be more difficult to key or finish. Use only a product that specifically lists porcelain as a suitable substrate.
Natural stone
Marble, limestone, travertine, slate and other stones differ in porosity, chemistry and finish. General ceramic fillers, acids, aggressive sanding and unsuitable sealers may stain or alter them. Ask the stone supplier or a stone-restoration professional for material-specific advice.
Wall and floor tiles
Wall tiles generally face less abrasion and impact. Floor repairs must tolerate foot traffic, cleaning and concentrated loads, so a purely decorative paint touch-up is rarely enough for a recess in a floor tile.
Tile repair comparison table
| Tile type | Repair difficulty | Suitable general approach | When professional assessment is preferable |
| Ceramic tile | Low to moderate for a small chip | Colour-matched compound or ceramic repair kit on a clean, dry, stable chip | Deep damage, extensive cracking, loose tile or difficult pattern match |
| Porcelain tile | Moderate | Product specifically rated for porcelain; careful preparation and controlled finishing | Large edge chip, high-traffic floor, through-crack or no reliable colour match |
| Natural-stone tile | Moderate to high | Stone-specific resin, filler and finishing system selected for the exact stone | Polished or valuable stone, darkening, veining, large loss or unknown sealer |
| Wall tile | Low to moderate if dry and firmly bonded | Cosmetic fill for a small stable chip; replacement for major loss | Shower or wet area, loose tile, failed grout or suspected waterproofing damage |
| Floor tile | Moderate to high | Hard-wearing compatible compound for a minor stable chip | Hollow sound, movement, recurring damage, sharp edge or structural cracking |
Tools and materials
For a minor repair, you may need:
- gloves compatible with the repair product
- safety glasses, particularly while removing loose fragments or finishing a hard filler
- a vacuum and lint-free cloths
- the cleaner specified by the repair-product manufacturer
- masking tape
- a tile repair kit, two-part epoxy filler or other compound rated for the tile material and location
- a small mixing surface and applicator supplied or approved for the product
- colour pigment supplied for that repair system, if required
- fine finishing materials only where the instructions permit them
Read the label and safety data before opening the product. Epoxy resin and hardener can irritate or sensitise skin, and requirements vary by formulation. The Health and Safety Executive identifies epoxy resins and hardeners among substances that commonly cause occupational skin problems. Follow the supplier’s glove advice, wear eye protection where directed, and ventilate the room. See the HSE guidance on construction skin risks.
Never mix different repair products, cleaners, hardeners or solvents unless they are components of the same system and the manufacturer instructs you to combine them.
How to fix a chipped tile step by step
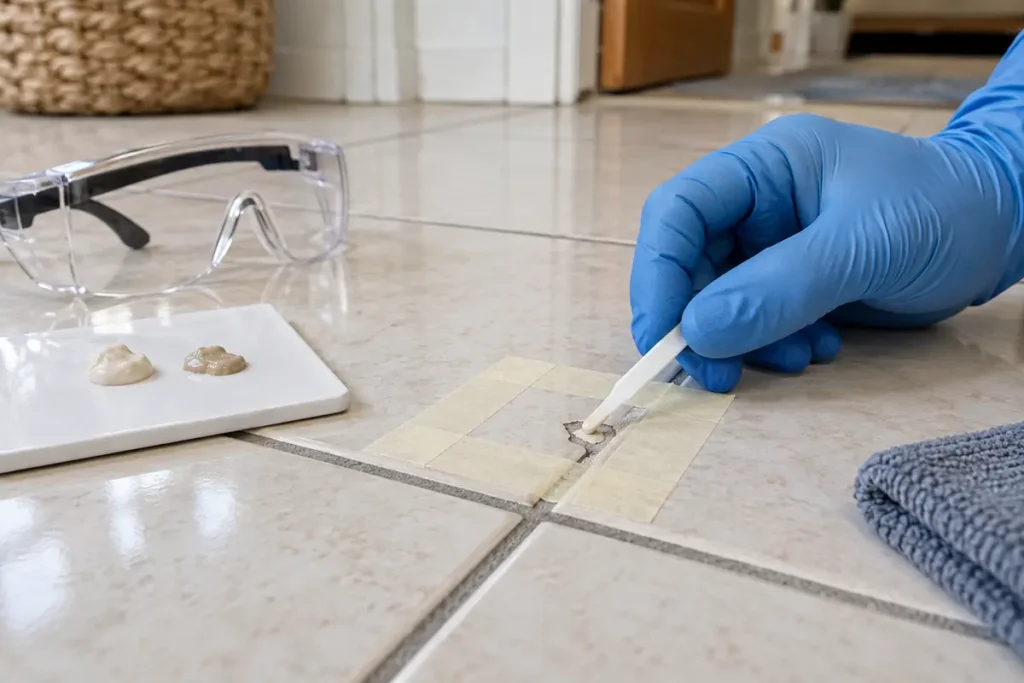
1. Check that the tile is stable
Press gently around the damage. Do not proceed with a cosmetic fill if the tile moves. Tap cautiously with a non-metallic handle and compare the sound with adjacent tiles. A broad hollow sound can indicate poor contact beneath the tile, although diagnosis is not always possible from sound alone.
2. Make the area safe
Keep people and pets away. Wear the protective equipment required by the product. If an edge is dangerously sharp, cover the area temporarily without pressing adhesive tape into the chip.
3. Clean and dry the chip
Vacuum dust and loose grit. Clean only with a method compatible with both the tile and repair compound. Remove grease and cleaning residue, then allow the recess to dry completely. Do not use a solvent simply because an online guide suggests it; it could mark the glaze, react with a sealer or conflict with the filler.
4. Remove only loose material
Lift fragments that are already detached, using the product instructions as your guide. Do not widen the chip, grind sound tile or use a metal tool against the finished glaze. Stop if the damage begins to spread.
5. Test the colour
Mix a small sample on a disposable surface, following the stated ratio. Compare it under the room’s normal daylight and artificial light. Wet material may cure lighter, darker or glossier, so use the manufacturer’s cured sample guidance where available.
Plain tiles may need one base colour. Speckled, veined or textured tiles are harder to imitate and may need a specialist layered repair. Aim for a discreet match, not a promise of invisibility.
6. Mask the surrounding surface
Apply low-tack masking tape close to the chip without covering its edges. This helps keep filler off the undamaged face. Test tape first on delicate, sealed or hand-finished tiles.
7. Mix and apply the compound
Measure and mix only the amount required, using the supplied tools and working time. Press the compound into the chip without trapping obvious voids. Slightly overfilling may be required by some systems; others should be levelled immediately. Follow the specific instructions rather than assuming all epoxies behave alike.
8. Level the repair
Use the recommended plastic applicator to bring the surface level with the tile. Remove excess before it hardens if directed. Avoid smearing resin across grout or the surrounding finish.
9. Allow the repair to cure
Protect the area for the full cure time stated on the pack. “Touch dry” does not necessarily mean ready for foot traffic, water or cleaning. Maintain the recommended temperature and ventilation, and keep children and pets away.
10. Finish cautiously
Only sand, polish or coat the repair if the system permits it. Protect the original glaze and wear eye protection if particles may be released. Stop when the repair is flush and safe; chasing a perfect sheen can scratch the undamaged tile.
Repairing different tile types
How to fix chipped ceramic tile
For a small chip in a firmly bonded glazed ceramic tile, select a ceramic repair kit or compatible two-part filler. Match the body colour first, then reproduce the surface sheen only with a compatible finishing coat. If the chip reaches an edge that carries weight or the tile has cracked, replacement may be safer.
Repairing chipped porcelain tile
Choose a porcelain-rated compound. Because porcelain is dense and hard, preparation and adhesion matter; do not substitute a general wall filler. A through-bodied porcelain may disguise a shallow chip better than glazed material, but a repair can still differ in texture. Large chips on steps, corners or heavily used floors merit professional assessment.
How to fix a chipped tile floor
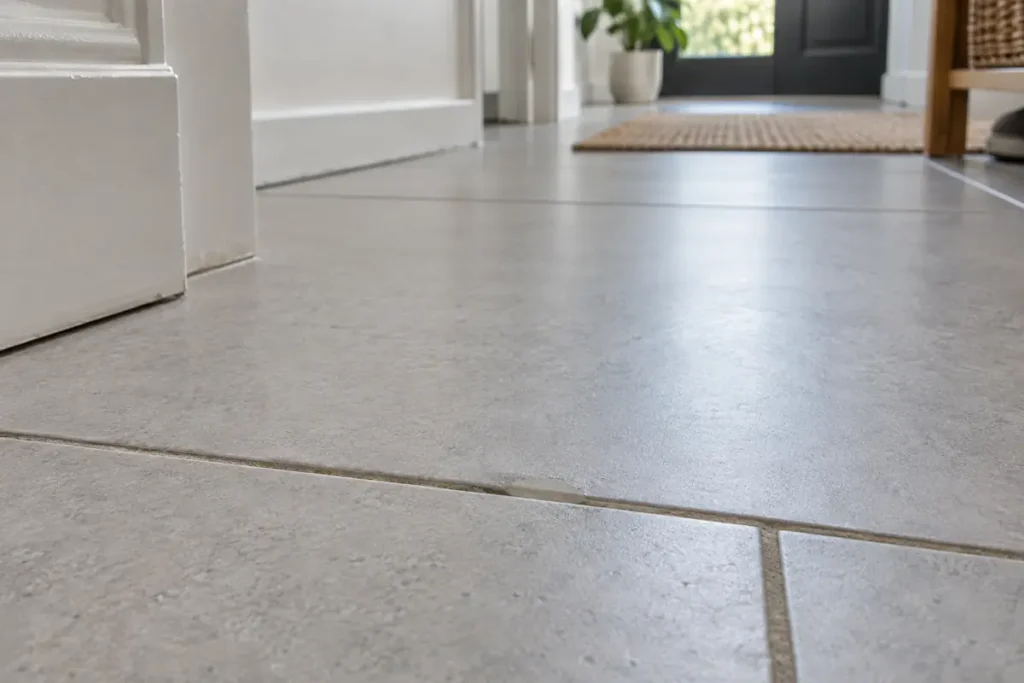
Confirm the tile is fully supported and does not move. A repair on a traffic route must finish flush so it does not catch feet, shoes or cleaning equipment. Keep the area unused until the compound has achieved the manufacturer’s full service cure.
Repairing a chipped wall tile
A minor dry-area wall chip is often the simplest cosmetic repair. In a shower, around a bath or behind a basin, first consider whether the glaze, grout, sealant or background has been breached. A surface patch should not be used to conceal suspected waterproofing failure.
Repairing natural-stone tile
Identify the stone and existing sealer before selecting a filler. Resin can darken porous stone, while polishing may change the surrounding finish. Use a specialist when the stone is polished, valuable, heavily veined or installed in a wet area.
Epoxy, filler or tile repair kit?
A tile repair kit is often the most convenient choice because its filler, pigments, applicators and instructions are designed to work together. Confirm that it suits the material, colour, indoor or outdoor location, and whether it will be walked on or exposed to water.
Two-part epoxy can bond and fill effectively, but it must be intended for the relevant tile and service conditions. The resin-to-hardener ratio, working time, cure and protective measures are product-specific.
Generic decorators’ filler, grout or silicone is not a like-for-like substitute for a hard tile face. Grout is intended for joints, while flexible sealant may remain soft and collect dirt. Do not combine systems in an attempt to improve them.
Temporary cosmetic fixes and their limits
A matching touch-up glaze or paint may disguise a pinhead-sized loss on a dry wall tile if the manufacturer approves it. It does not rebuild a deep chip or create a durable floor repair. Nail varnish, marker pens and improvised household coatings can discolour, peel, remain slippery or complicate a later repair.
For an immediately hazardous edge, restrict access and cover the surrounding area temporarily until it can be assessed. Do not rely on tape as a repair in a floor or wet area.
Common tile-repair mistakes
- Filling a moving, loose or damp tile without finding the cause
- Choosing a product by colour alone rather than substrate and location
- Guessing the mixing ratio or extending the working time with another chemical
- Leaving grease, dust or cleaner residue in the chip
- Spreading filler over sound glaze and grout
- Sanding aggressively and dulling the original finish
- Using the floor or shower before full cure
- Expecting a patch to restore waterproofing or structural support
- Promising that the repair will be completely invisible
Why tiles chip and how to prevent it
Impact from dropped pans and tools is common, but recurring chips can point to unsupported edges, movement, an uneven background, an incorrect adhesive bed or heavy point loads. Use doorstops where handles strike tiled walls, protect floors during building work and lift heavy items rather than dragging them.
Keep a few spare tiles from every installation, labelled with the range and batch. Check damaged grout and movement joints rather than filling them rigidly. If several tiles crack or sound hollow, pause further cosmetic repairs and ask experienced London building specialists to assess the tiled area and underlying cause.
When to call a professional
Professional assessment is sensible for a cracked or loose tile, extensive loss, natural stone, valuable patterned tiles, shower enclosures, recurring damage, steps and busy floor areas. Replacing one tile can also involve cutting grout and adhesive close to waterproofing, pipes, cables or underfloor heating.
One Call Home Services lists tiling and property repairs among its professional building services in London. Share photographs and details of the location so the team can confirm whether the repair is within scope.
Industry installation guidance also treats loose, hollow-sounding and damaged tiles as defects requiring removal and correction rather than a surface-only disguise; see this Mapei ceramic tiling pocket guide.
Frequently asked questions
Can you repair a chipped tile without replacing it?
Yes, a small stable chip can often be filled with a colour-matched compound made for that tile material. Replace or assess the tile if it is loose, cracked through, hollow-sounding or affected by moisture.
What is the best filler for a chipped tile?
Use a tile repair compound whose manufacturer lists your substrate and location, such as glazed ceramic, porcelain, natural stone, wall or floor. There is no single filler suitable for every tile.
Can I use epoxy to repair a chipped floor tile?
Only if the epoxy is specified for that tile and floor use. Follow its ratio, protective-equipment, ventilation and cure instructions. Do not apply it over movement or moisture damage.
Will a tile repair be invisible?
Not necessarily. A good colour and sheen match can make a small repair discreet, but lighting, texture, pattern and ageing may leave it visible on close inspection.
Should a hollow-sounding tile be replaced?
A hollow sound may indicate incomplete adhesive contact, but the extent and cause require assessment. If the tile also moves, cracks or carries heavy traffic, do not rely on cosmetic filler.
Can I repair a chipped shower tile?
A tiny surface chip may be repairable, but damage in a shower should be checked for cracks, failed grout, sealant and possible waterproofing issues. A cosmetic patch does not reinstate an unknown failed waterproofing system.
How long does tile repair compound take to dry?
Dry and cure times vary by product, temperature and conditions. Use the time stated by the manufacturer and distinguish between touch dry, handling cure and full service cure.
Need help repairing damaged tiles?
A small cosmetic chip may suit a careful DIY repair, but cracked, loose or extensively damaged tiles often need professional attention. One Call Home Services can discuss suitable tiled-area repairs and wider property work across London.

